Back to Manual Table of Contents
The Appointments module is the heart of the dental practice:
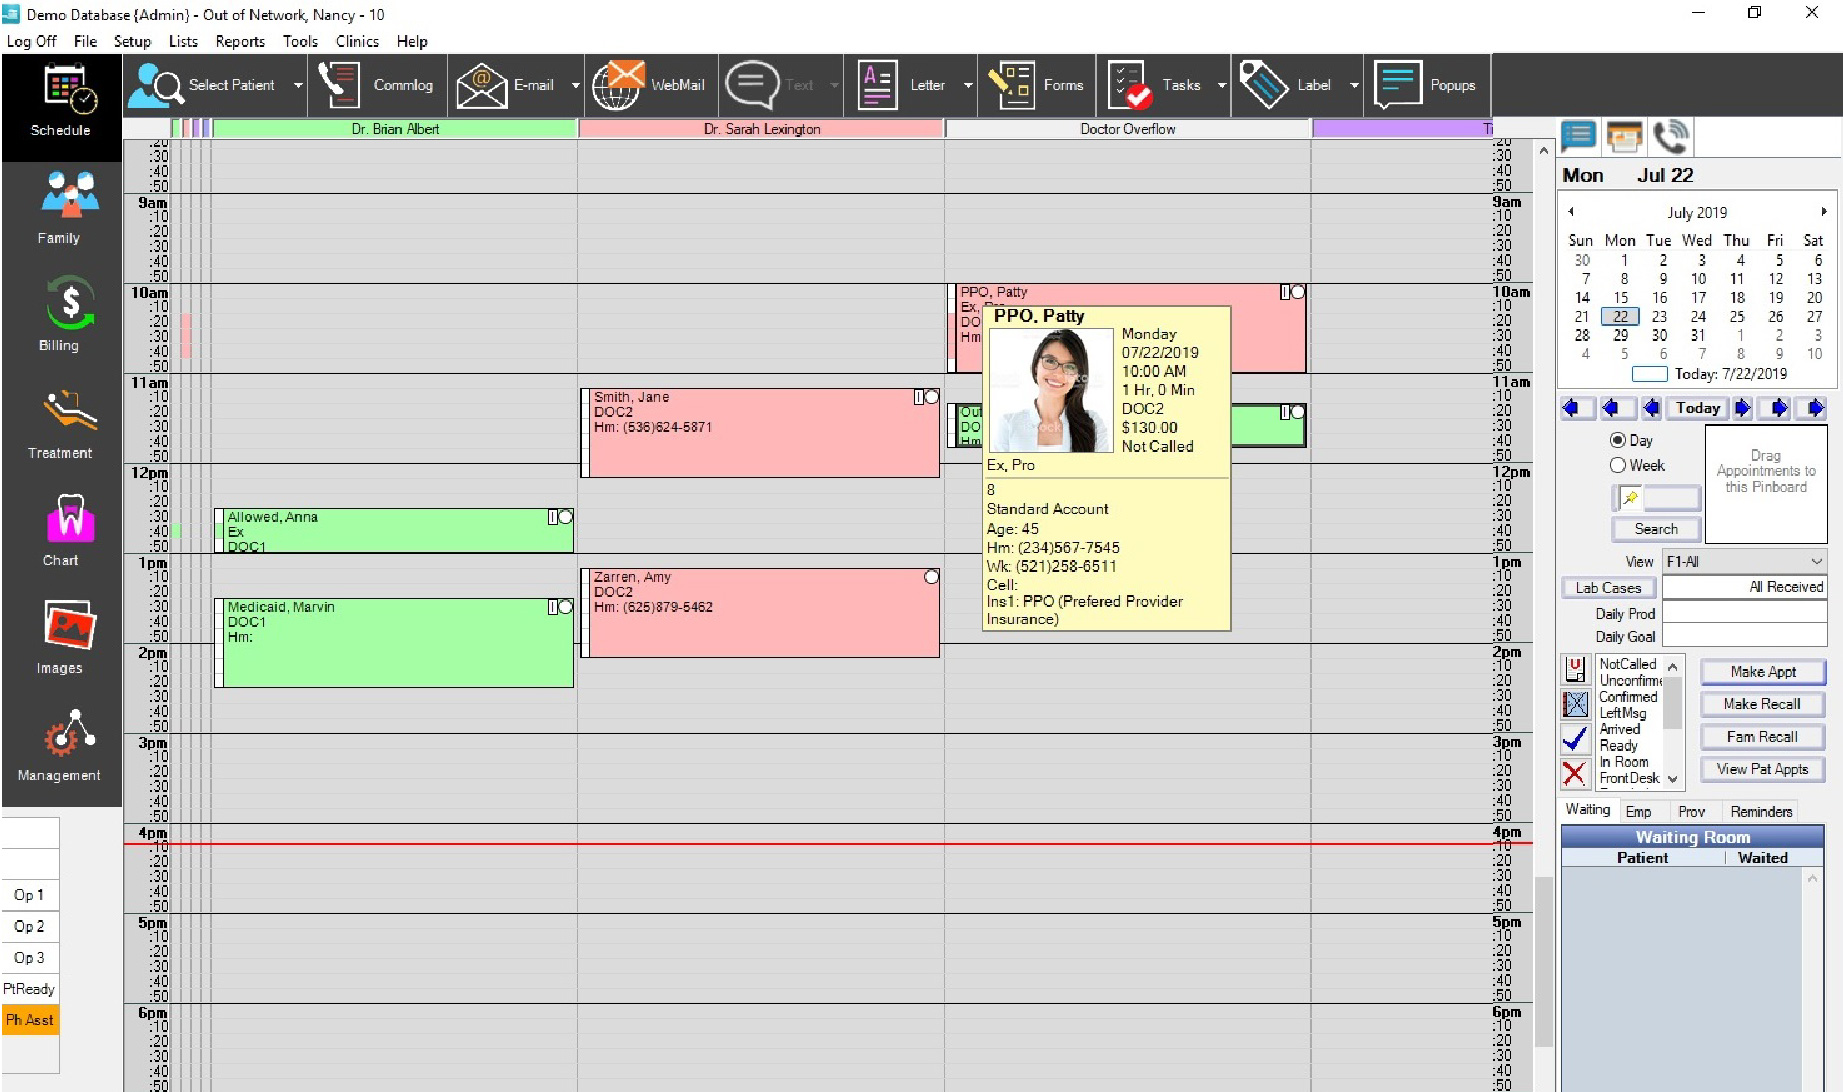
DentOffice has support for unlimited operatories and unlimited providers. Although you can only view about 6 or 7 operatories at one time due to space limitations, you can set up different Views. Each view can have any combination of operatories and providers, and will not display the others. So you can have one view for your hygeine rooms, one view for each doctor, or any number of other creative combinations. To switch between the different views, you would normally use one of the twelve function keys at the top of your keyboard. You can also select a view from the drop down list on the right hand side below the calendar and pinboard. You can see that an entire ten hour day fits on the screen.
The grayed-out appoinments at the beginning of the day above have been marked complete (colors are customizable), and the appointment with the X across it is a broken appointment that is waiting to be handled. The operatory names can be as descriptive as you want and can be rearranged at any time in the definitions or in views. Each procedure gets its own line in the appointment, so the appointment does not have to be very wide to show all the procedures.
Also shown are five providers. Each provider gets a bar to the left of the appointments section that shows that provider's time. Each provider is a different color. The colors can be changed and the order of the time bars set in the provider setup or in views. In the Appointments module, hovering over the colored square directly above each provider's time bar will display the name of the provider. In the example above, the practice is open where the background is white, and closed where it is gray, although the colors are completely cusomizable in definitions.
The scroll bar to the right allows you to move up and down throughout the entire 24hr day. The scrollbar has infinite scrolling, making it very smooth and efficient. To quickly move to a different day, you can use the calendar or the navigation buttons just below the calendar. In the calendar, you can click on any day to go to that day in the appointment book. The day showing in the appointment book is represented by the gray square, whereas the red outline represents the current date. To go to a different month, use the buttons at the top of the month calendar. The most common button to use is the Today button, just below the calendar. The buttons on either side will navigate forward and backward one day at a time. The Week button below takes you to the current week, but does not change the day of the week displayed. The buttons to either side will navigate one week at a time. The pinboard to the right is for moving appointments between days. Simply drag the appoinment onto the pinboard, select a different day, and drag it back off.
The notes sections at the lower right shows notes from various areas of DentOffice for the currently selected patient. Just above that are the action buttons for working with the currently selected appointment.
The horizontal red line indicates the current time. It automatically moves down every minute and lets you visualize the time to within a minute or two.
The small letters in the upper left corner of each appointment refer to credit type: A, B, or C, or you can use whatever letters your office prefers. An "I" also shows if the patient has insurance. Every appointment has a second optional provider for hygeine so that only one appointment has to be made even if a patient is technically seeing two providers. Appointments are edited by double clicking on them.
The four toolbar buttons (upper right) are for "Select Patient", "Unscheduled List", "Recall List", and "Print". The print button will print the day being viewed and allow you to select the number of copies. When it prints, it automatically prints showing the hours that the practice is open. These schedules can be posted throughout the office in areas where you do not have monitors.