Back to Manual Table of Contents
Appointment Views
In the Appointments module, only about six or seven operatories will show at one time because of the screen size. If have more operatories or you want to have more control over what is showing, you can set up different view. From the Main Menu, select Setup | Appointment Views.
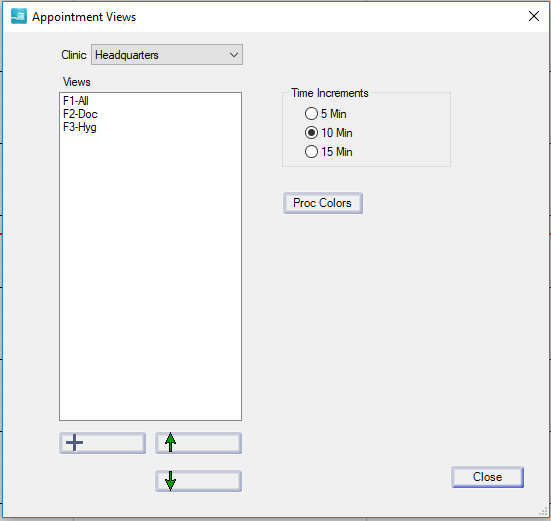
From here, you can add new views and rearrange them by using the up and down arrows. You will notice that each view is assigned an F key. The first twelve views can be activated from the Appointments module by using one of the F keys a the top of your keyboard. This makes switching between views very fast. Alternatively, you can use the drop down Views list at the right middle of the Appointments module.
You can use either 10 or 15 minute increments for your office. It does not cause any problems to switch between time increments, but you should pick one or the other and stick with it, because the time pattern that you have set up for each Procedure Code will not change. So, if you have a procedure code set with a 40 minute pattern (/XX/), and you change to 15 minute increments, then the next time you schedule that procedure, it will use the same time pattern, resulting in a one hour calculation. Note that this does not change any previously scheduled appointments, but only scheduling or recalculating existing appointments.
Each view can have any combination of operatories and providers, and will not display the others. So you can have one view for your hygiene rooms, one view for each doctor, or any number of other creative combinations. If you click the add button or double click on an existing view, the following window will open:
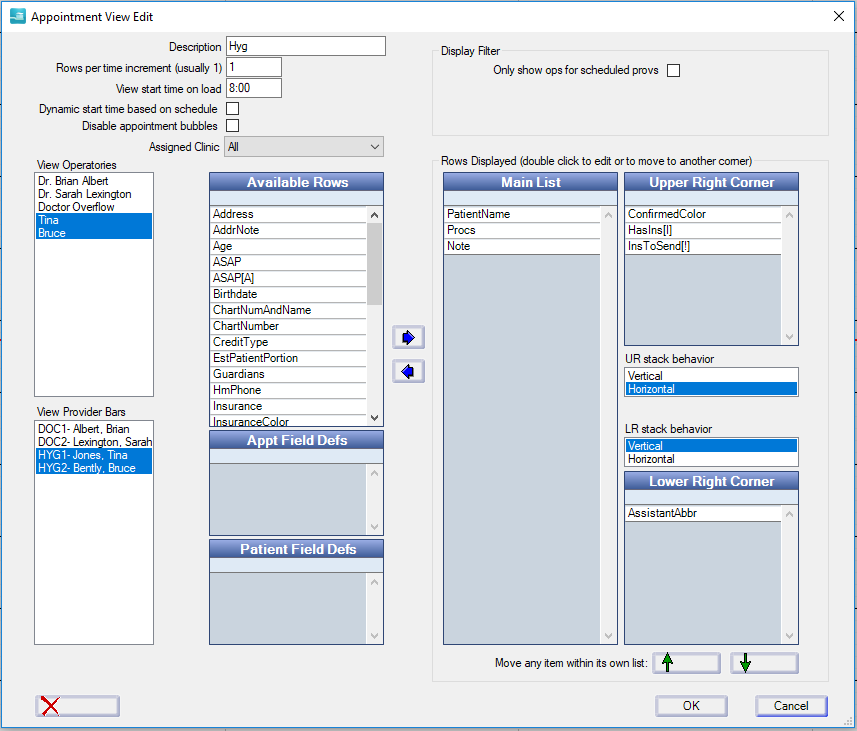
You can highlight any number of operatories by dragging or by holding down the control key. Remember that operatory names and orders are set from Definitions. Similarly, you should highlight whichever providers you want to show. Provider names, abbreviations, and order are set from Providers. Setting a provider to not view does not prevent their appointments from showing in a visible operatory; all it does is remove their vertical time bar along the left of the Appointments module screen.
You can change the rows per time increment at the top. The main reason for doing this is if you want to be able so see more info on short appointments, especially when using 15 minute increments. But if you make the appointments too large, the graphical interface becomes a little more sluggish, and you can no longer see the entire day on one screen.
The two large lists in the middle let you set what information gets displayed on each appointment when using that view. Most items are self explanatory except procedures. Procs lists the procedures one row at a time. ProcDescript lists the procedures all on one row with shorter descriptions. It is recommended to use Procs since the descriptions are better do not tend to get cut off.
You can set a custom color for any item by double clicking on it.
If you are going to set up any Views, it is strongly recommended to have the first view include all operatories and all providers so that you don't lose track of the organization of the appointments and so you can easily view all operatories.