Back to Manual Table of Contents
Most forms and letters that you would normally store in the patient's chart can instead be scanned in and stored here. If you still use paper charts, they can be much thinner and cleaner. Images are saved as simple jpg making them always available to other programs. See the Imaging section for information on how DentOffice works with other hardware and software vendors.
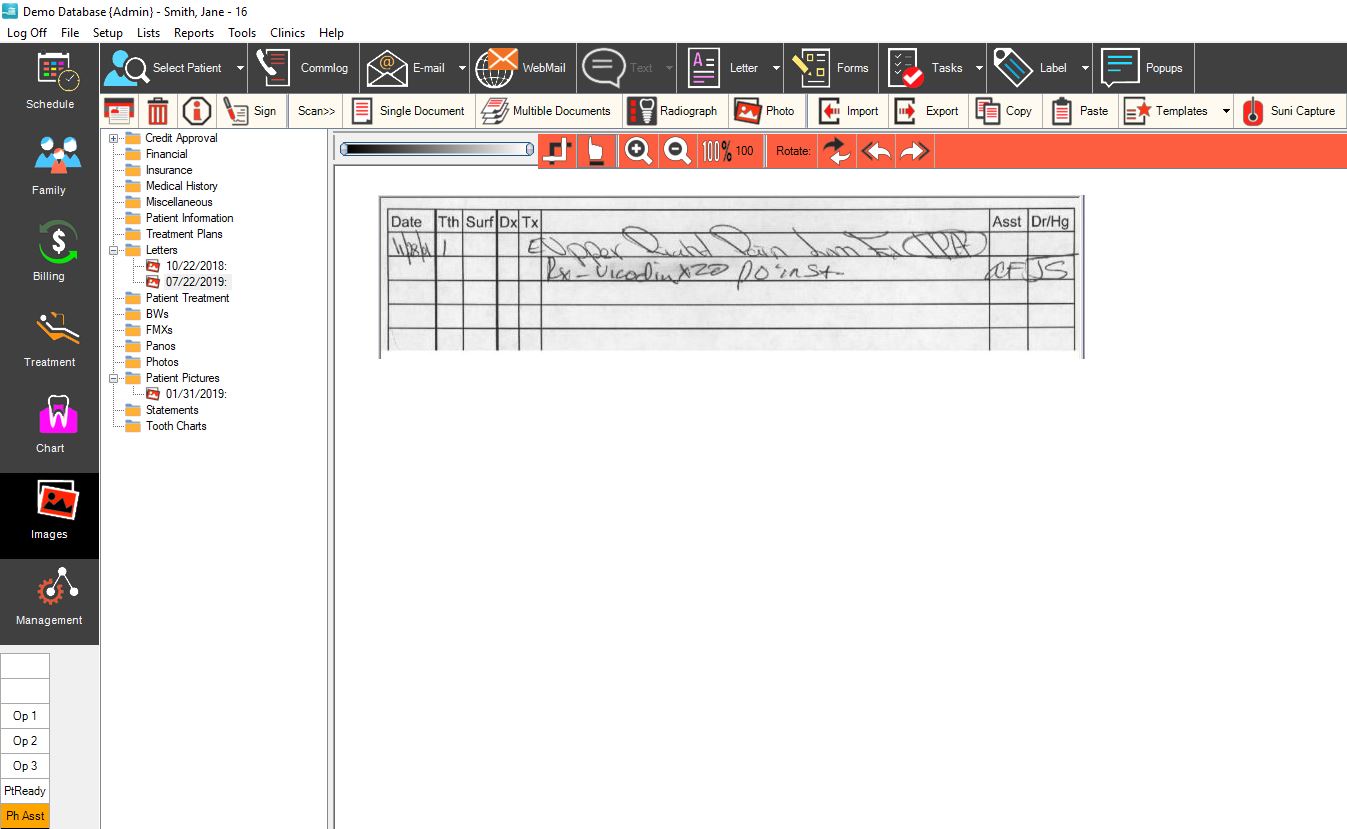
In the screenshot below, you will see that you can attach any file type at all, including Word, PDF, and Excel formats.
For jpg and gif types, the image is shown in the window on the right when you single click on the item in the tree. For other file types, there is no preview capability yet, so you double click on the item to open it in whatever program it would normally be used in. Because OpenOffice.org is free, you can install it on all your computers and use it to view and edit documents and spreadsheets attached to patients.
The buttons across the top are used as follows: The first button is to select a different patient, and works just like the Select Patient button in the other modules. The next group of three buttons is for actions that can be taken on the currently displayed image: Print prints the image after letting you select the printer. The image is automatically sized to fit the page. Delete deletes the image, and Info displays the information about the image such as the name and date, allowing you to make changes:
In the document information window above, you can select the category. Categories are user defined in Definitions. The date and description can be changed from here as well.
The file name is the name of the actual file and can not be changed. The file is named automatically as the last name, first name, and a unique number (the autoindex number of the document table in the database). All files for a patient are stored inside the patient's folder which are then stored in the A through Z folders according to last name. So, in the example above, the file location is \\Server\OpenDentalData\S\SpanderJason2\SpanderJason33.jpg. The name of the patient folder, SpanderJason2 in this case, is also automatically determined based on last name, first name, and a unique number (Patient.PatNum in the database). You have total access to the images so that you can copy them or open them from any other program, but you should NEVER move them or rename them, since then DentOffice will not know where to find them. Keeping all images for a patient within a single folder makes it easy to copy all your images into other programs and to keep things very organized.
The next three buttons on the toolbar are for Scanning, and then Import and Paste from clipboard are after that. Instructions on how to use those buttons may be found in that section of the manual.
The next two buttons toggle between Crop mode and Hand tool mode. When in hand tool mode, if you are zoomed in, you can move the image around the viewing area by 'grabbing and dragging' with the mouse. In crop mode, when you drag, a rectagle is created and you have the option of cropping the document to the size of the rectangle. Cropping is automated for scanning, so whenever you scan you usually don't need to worry about manually creating the rectangle.
The next two buttons zoom in and out in 50% increments. You can use the hand tool as you zoom in to reposition the image.
The last three buttons let you flip and rotate the image in 90 and 180 degree increments. You should be aware that flipping and rotating images does not actually change the image on the disk. Instead, it simply changes the way it is displayed. The reason that it does not change the actual file on the disk is that, because the image is in a compressed format, it would result in a slight loss of data as the the image is recompressed.