Back to Manual Table of Contents
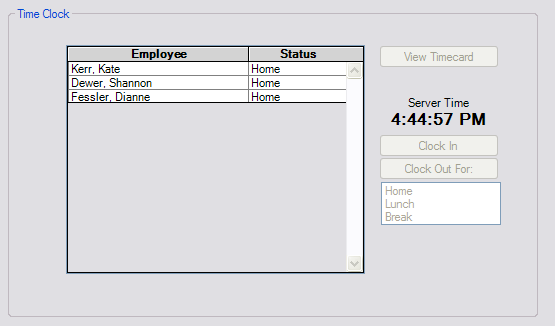
In the Manage module, the lower half contains the Time Clock.

The employees are set up in the Employee list. To clock in, the employee should click their name and then the Clock In button. To clock out they click their name, then a status below the buttons, then the Clock Out button. This forces them to specify whether they are clocking out for lunch, break, or to go home for the day. The displayed time is the time of the computer where the mySQL program is running, so the time may be a minute or two different than the local computer time. This keeps all clocking in and out consistent throughout the office and prevents tampering with the computer clock if the server is physically unaccessible.
If employees want to see their time card, they can click their name and then the View Timecard button.

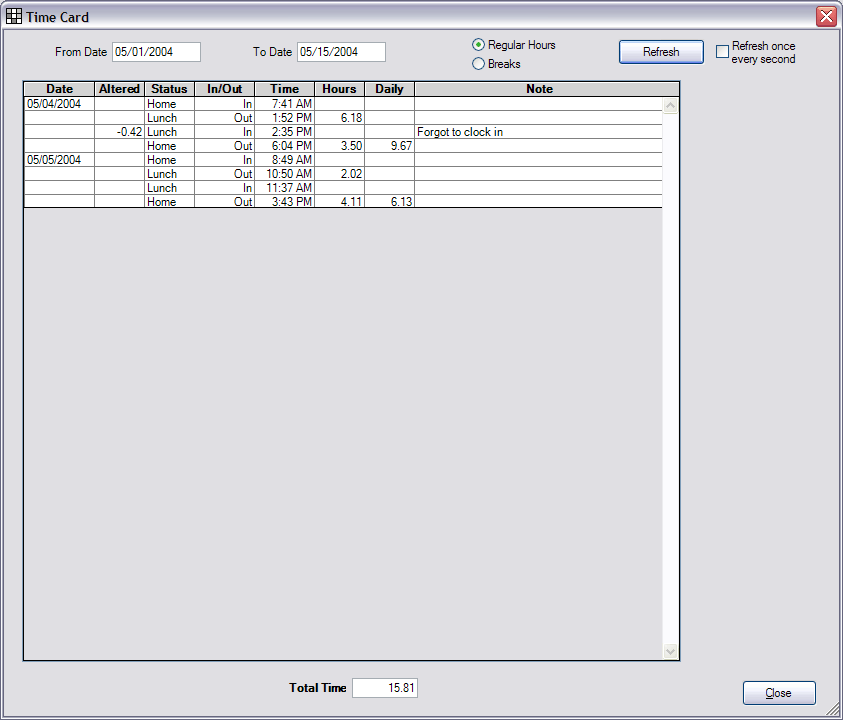
The timecard will show all the clock events for the given date range. Notice that there are two different views of the time card: one for regular hours, and one for breaks. You can select one or the other using the radio buttons at the top. Regular hours are never shown at the same time as breaks. When you switch to the breaks view, the box at the upper right will get checked, and the screen will refresh once every second. This allows employees to keep an eye on how much time they have left on their break. When in break view, the time shown will be in minutes, but in regular view, the time will be shown in hours.
To edit a clock event, double click on it.

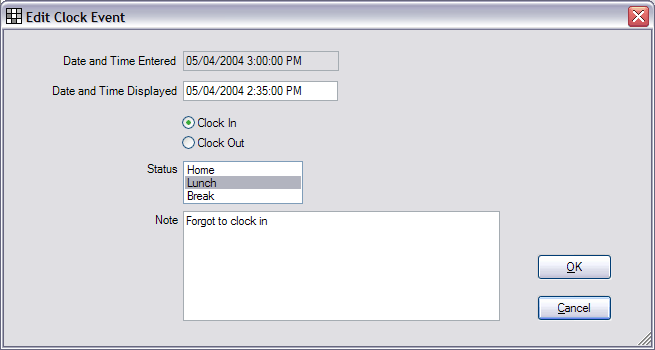
This is where you or the employee may edit the time if a mistake was made. Notice that you can not edit the actual time, but only the displayed time. Any times that have been altered in this manner are clearly marked in the time card with the amount of time that they were altered by. You should establish a policy that all alterations must be accompanied by a note as to why they were altered.
In this window, you can also change the Status and whether it was a clock in or out. This is useful if someone makes a mistake. There is no delete button since all clock events are permanent. Here are a few examples of how to fix a timecard with errors:
1. Forgot to clock out when leaving for the day: The next morning, they realize the mistake and clock out. Then they immediately clock back in to begin today's time. So at this point, the only clock event that is in error is the second from the last. Double click on that clock event and change the day to the previous day and the time to when they estimate they clocked out. The status will remain 'home' since they were clocking out to go home. When you click OK, that entry will show -16 hours, or possibly much more. That's ok. It is simply a visual reminder that a really big mistake was made.
2. Clocked out for lunch and then never came back to work. Then next morning, they clock in as usual. All the times are now correct, but the status of the second from the last clock event is misleading. Double click on that item and change the status to Home.
3. When clocking out for break they discover that someone else in the office accidently clocked out for break on their timecard. So now it shows that they have been on break for 2 hours and their time is still ticking. Solution is to clock back in. Double click on the last clock event and change the time to be one second after the erroneous clock event. Do not set the time to exactly the same as the erroneous event because that might accidently change the order that the items show on the page and alter the calculations.
At the end of the pay period, open each employee time card and print using the PrintScreen Tool. The total for that time period will be shown at the bottom.
Future planned improvements are better time period features, printing, and overtime calculations. Benefit tracking such as uniform allowance, sick time, vacation, etc will eventually be included although it is not planned for the short term.