Back to Manual Table of Contents
Claim Forms
From the Main Menu, select Setup | Claim Forms.
This is only for printed claims. See the E-Claims section for information on sending e-claims. It is much harder to add an e-claim format (for instance, for foreign countries), but a programmer could do it.
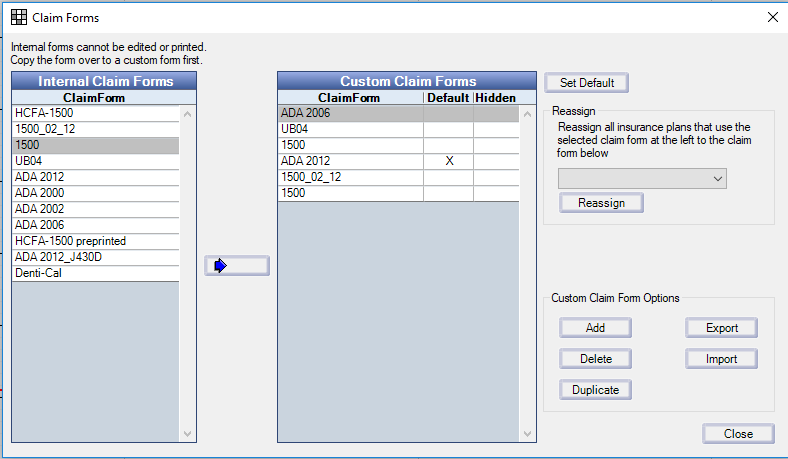
Editing Claim Forms
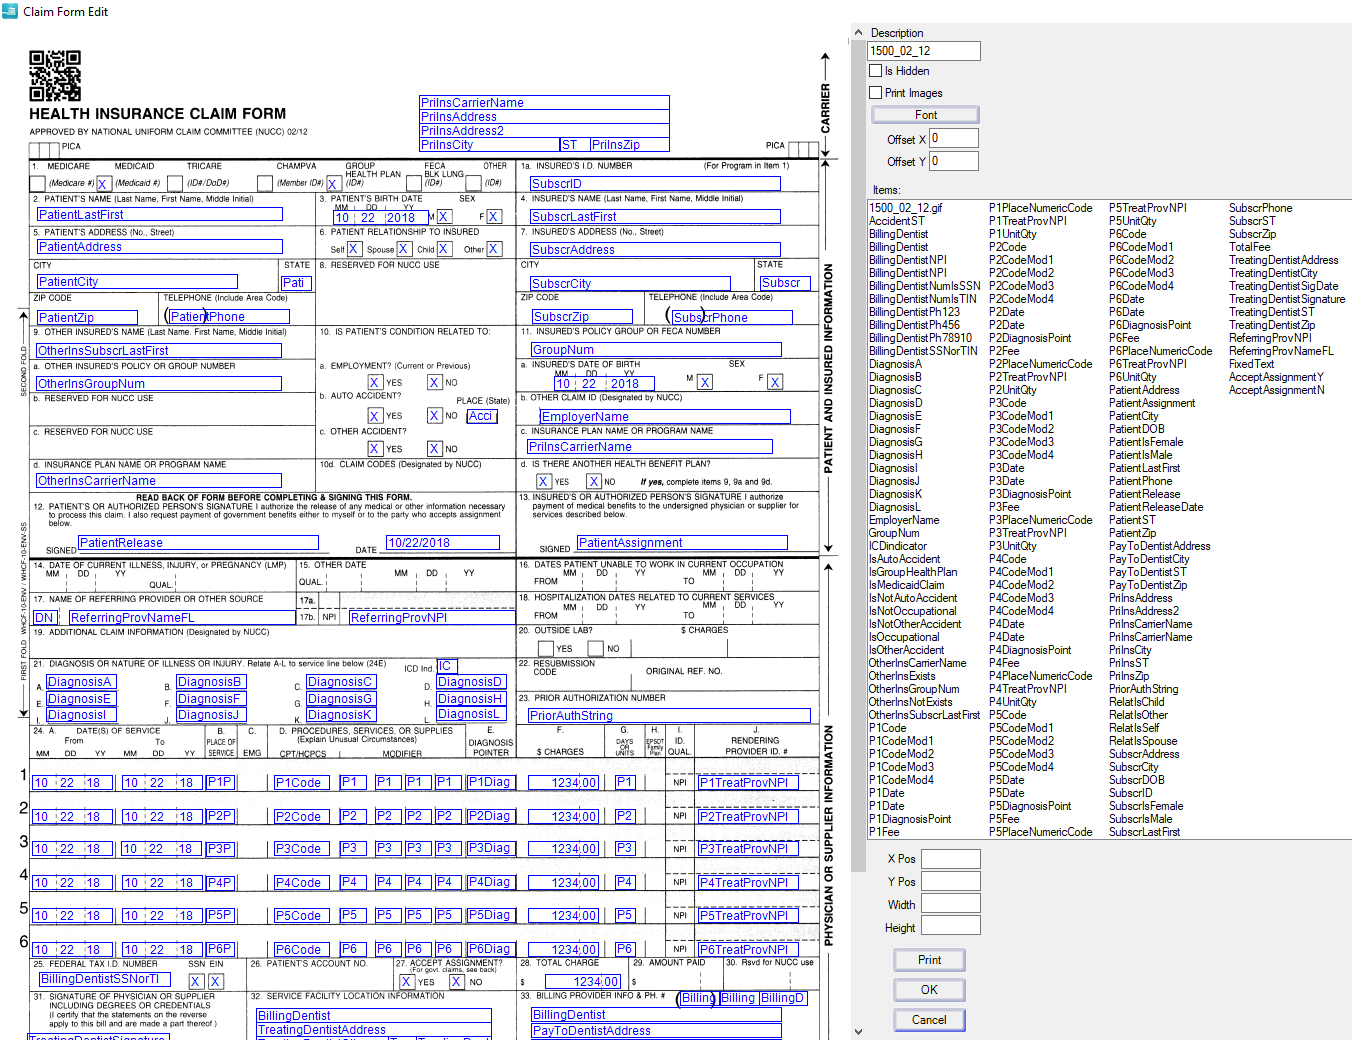
The list is used when you want to edit the available claim formats. You can double click on an item to bring up the large edit window shown below, but this is mostly for advanced users. This is a very large window that might only fit on a larger monitor. The only changes you might normally make would be to change some of the fields at the upper right. If you check the 'Is Hidden' box, then this claim form will not show as an option in the Insurance Plan Edit window. If the box for 'Print Images' is unchecked, then the background claim image will not print. This can be useful if you are printing on a preprinted form, like DentiCal. If the alignment is slightly off for your preprinted form, then you can change the 'Offset X' and 'Offset Y' fields. The numbers can be positive or negative and will shift all elements on the page by the given number of pixels in 100'ths of an inch.
If the changes you want to make to a form are significant, then you will want to use the "Make a Copy" button to make a copy of one of the supplied claim forms. Then, make your changes to the copy. Also rename your copy to something meaningful. You can add your own claim form from scratch, but that is very involved and takes a lot of time. You can delete a claim format as long as it is not being used by any insurance plans.
If you want to create your own claim form (and hopefully share it with the rest of us), here are more detailed instructions.
Start by preparing a background by scanning a paper form at a high resolution, maybe 600dpi grayscale. Then, increase the contrast in Photoshop to make the black lines look blacker and the white areas whiter. Also erase any black flecks that remain. Then, resample to about 250 dpi, 8 bit b/w palletted, and save it preferrably as a gif, or alternatively as a jpg. If you save it as a jpg, set the compression and smoothing for as small a file size as possible without losing detail, somewhere between 200 and 500 Kb. The larger it is, the longer it will take to print. Save this jpg or gif in the OpenDentalData folder. If you save it as a gif, you will also be able to easily adjust the size of the image just like any other element on the page by changing the width and height. But a jpg is locked into the size that it was created in.
Start a new ClaimForm and add the background as the first item. Do some trial printing to make sure it's sized right and is positioned on the page so that it won't get cut off on one side. If you are using a gif, you can make adjustments to the size. You may also have to adjust the xPos or yPos (not the offsets). Once you are happy with the quality of the background, you can begin adding more items using the existing forms as examples where needed.
You can move items by clicking and dragging or by using the arrow keys. If you press the shift key while pressing an arrow key, the movement will be larger. You can select groups of items as shown above and then move them as a unit. When you have groups selected, any change you make in the four text boxes at the bottom will apply to all items in the group. The dollar amount fields are right justified, so the x position will function differently (for now, click to the right of an amount field to highlight it). Also, be careful not to accidently drag when highlightling items, especially groups; it's still a little touchy. Set the width or height to zero to get rid of the surrounding rectangle and to not restrict the area of printing. Also, the screen will flicker a little as you drag, but it's certainly tolerable, and it's not worth the time required to reduce the flicker since it's used so rarely.
Sharing Claim Forms
If you develop a form that you find useful, you can share it with anyone by using the Export button. This creates a text file that you can send to someone. Then, they use the Import button to import that text file into the DentOffice database. This makes it easier for users in other countries to share their claimforms. Also, we would love to have a copy of any claimforms you find useful so we can include them in the next release or post them for download.