Back to Manual Table of Contents
In the Chart module at the top, click Perio:

Exams
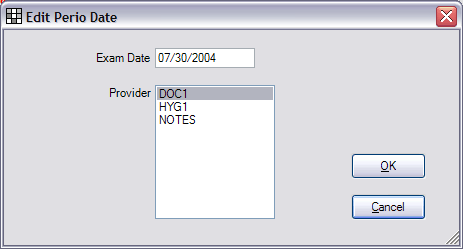
The first thing you will do is Add an exam at the left. Once you have created an exam, you can double click on the date to change the date or the provider:

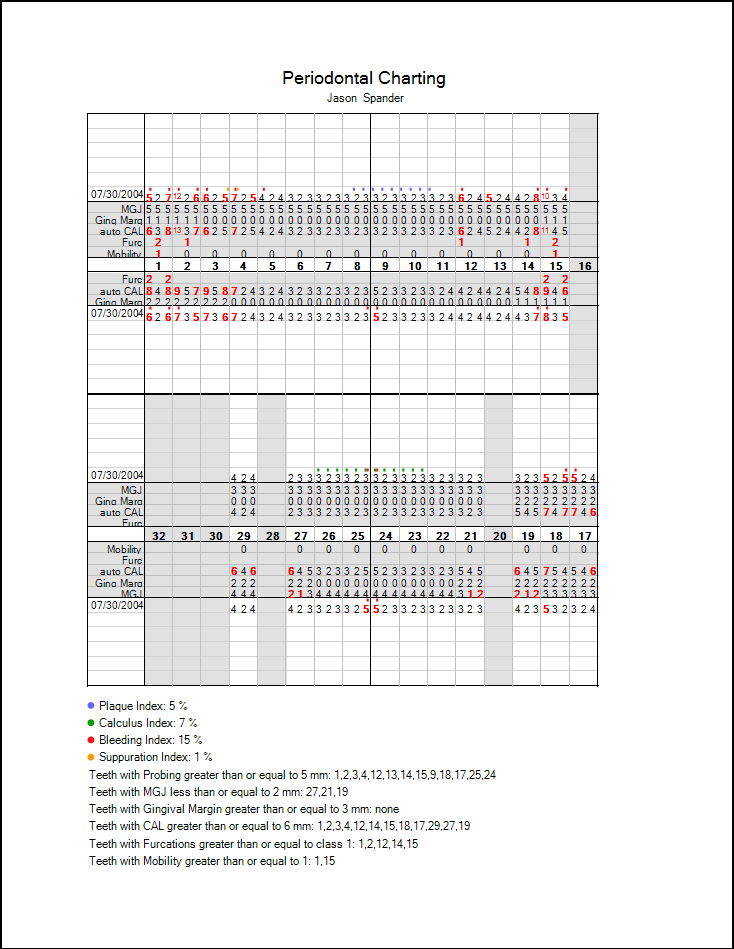
All data that you enter will be automatically saved and the only way to not save it would be to delete the exam. You can see the 6 most recent exams in the grid for easy comparison. Whichever exam you select in the list will be the exam that shows in the grid along with data from all previous exams. For probing depths, each exam gets its own line in each of the four sections, but for the other measurements, only the most recent measurement is shown. All measurements from previous exams will be shown is a slightly greyer color than the current exam so that you can easily see which numbers are for the current exam.
Skipped Teeth
When you add the first exam, any teeth that you have charted as missing in the Chart module will be automatically marked skipped in the perio chart. Subsequent exams will copy the skipped teeth from the most recent exam. So if you later extract a tooth, you would manually mark it skipped the next time you add a perio exam. To mark a tooth skipped, click on the tooth numbers in the grid while holding down the Ctrl key, then click the Skip Teeth button. Skipped teeth are stored with individual perio exams, so each exam can have different teeth skipped. Once a tooth is marked skipped, the background will show gray. You can still record measurements on skipped teeth if you wish, but the autoadvance will normally jump over them.
Auto Advance
The auto advance is built-in to take the following path: 1-16 buccal, 16-1 lingual, 32-17 buccal, 17-32 lingual. You will need to start taking measurements in this order if you do not already, since there is no way to change it. The Auto Advance box at the top is handled automatically based on the above path, but you can change the direction temporarily as well.
Number Entry
There are two ways to enter numbers, either by using the numbers on your keyboard, or by using the number buttons on the screen. To enter a number greater than nine, you can either click the 10 button followed by the second digit, or you can hold down the shift key while you press the second number on your keyboard. The backspace and delete buttons work just like you would expect them to.
Plaque, Calculus, Bleeding, and Suppuration
These items are entered on the same rows as the probing depths and show as colored dots above each probing number. There is room for all four dots to show above each number. The color for each item can be customized by clicking on the corresponding colored box on the right side of the window. There are two ways to enter these items, either by using the buttons, or by using keyboard keys: plaque (p), calculus (c), bleeding (space or b), or suppuration (s). You can do these as you chart the probing depths, or you can do them separately. If you are entering them at the same time as the probing depths, then it is assumed that the order of entry would be, for instance, 5-bleeding. Since the probing depth comes first, you will already have advanced to the next cell. But that's OK, because if the cell you are in is still empty, then it knows to enter the item on the previous probing entry.
Three at a time
At the upper right, the three at a time option comes in handy for entering lots of plaque, calculus, gingival margins, or any other measurements that tend to be the same for the entire tooth. In the three at a time mode, the backspace key deletes three at a time and editing an existing entry will overwrite three at a time, so be careful to turn it off when done.
Types of rows
Probing- Each date gets it's own row with the date in the left column.
Mobility- Only shows on the buccal. Only allowed one number for each tooth in the middle cell. There is no mechanism yet to show +.
Furcation- Enter a 0-3. A later version will show a V or a triangle instead of the numbers.
auto CAL- Clinical Attachment Level is auto calculated as Probing + Gingival Margin. User not allowed to edit.
Gingival Margin- All displayed gingival margins are implied negative values (recession). There is no mechanism yet to enter a positive gingival margin (hyperplasia).
Muco Gingival Junction- Not present on the palatal.
Indices
On the right hand side is a button to recalculate the four index percentages. There are typically 6 sites per tooth and 32 teeth, for a total of 192 possible sites. But if any teeth are marked skipped, then those sites are not considered to be available and are excluded from the calculation. So if you have 19 of the 192 sites marked as bleeding, then the bleeding index is 10%.
Numbers in Red
Below the indices is the 'Numbers in red' section. For each different kind of row, you can set the values which will show in red. Notice that for the MGJ, it shows in red if it is smaller than the number showing instead of greater. The main concern here is that it show sites with little or no attached gingiva. For each kind of row, you can also show the number of teeth that have red numbers on them. On the printout, it will actually list out all the tooth numbers.
Using the print button will give you a printout that matches what you have on the screen.
