Back to Manual Table of Contents
Payment splits are usually handled automatically for you for simple situations. But if you need more control over how a payment gets split, then this is how you do it. The only way to access this window is to edit an entry on the splits list in a Payment.
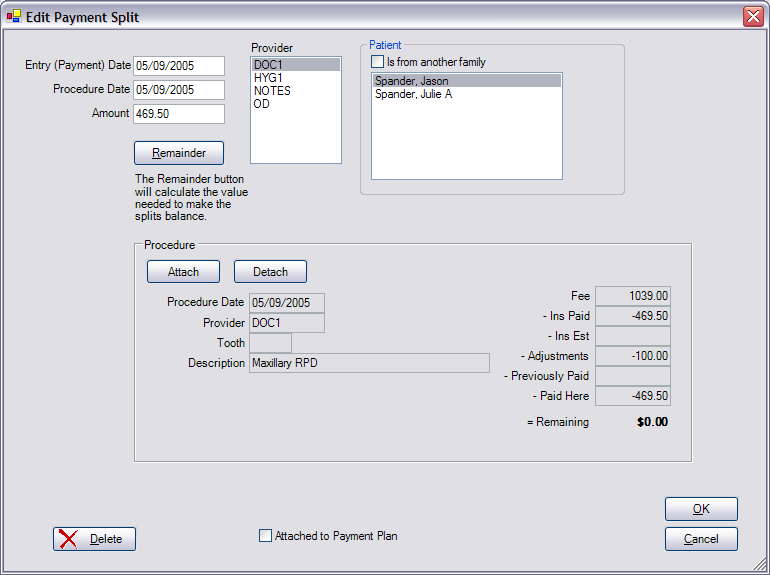
The payment date is always forced to be synchronized with the payment date, so you are not allowed to edit it. The procedure date is usually the same as the payment date, but can be changed to fine tune the aging. If you attach a procedure to this pay split as shown below, then the procedure date should be changed to match the date of the attached procedure. The patient list only shows family members unless you check the box to select members from another family. Notice that this means that one payment may be split between multiple families. The remainder button may be used when entering the last split to make the sum of the splits equal the total payment balance.
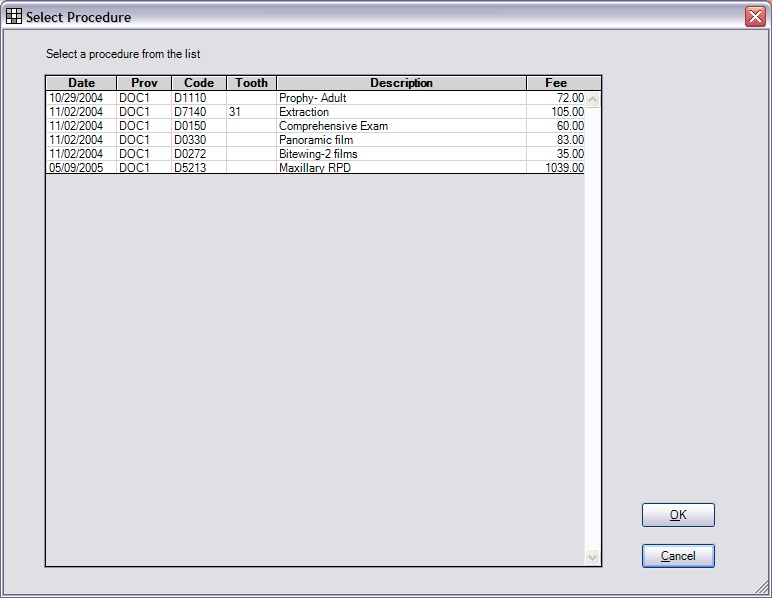
You can attach or detach a procedure from here. You must currently do this manually one procedure at a time, so it is not done very much, but it can come in handy. When you click Attach, you will be given a list of completed procedures to select from:
Then, in the paysplit window, the column on the right shows a summary of payment information for this procedure. This helps you to select the correct amount of the split to bring the procedure balance down to zero.
You can use the checkbox at the bottom to attach this split to a payment plan. If there is more than one payment plan for this guarantor, it will let you select which payment plan to attach the split to.